

How Is a Lower Limb Prosthetic Fitted?
Key Highlights
- A lower limb prosthetic fitting is a multi-step, personalized process tailored to each patient’s body and lifestyle
- Proper socket fit is the most critical factor for comfort and mobility
- The process includes evaluation, casting, test fitting, alignment, and training
- Adjustments are expected—fit evolves as the body changes
- Working with experienced clinicians ensures better outcomes, safety, and long-term success
Getting a lower limb prosthetic is not a one-time event—it’s a journey. From the first evaluation to walking confidently again, every step of the process is carefully designed to ensure comfort, stability, and function.
If you’re wondering how a lower limb prosthetic is fitted, this guide walks you through each stage, backed by real-world insights from clinical practice.
Understanding Lower Limb Prosthetics
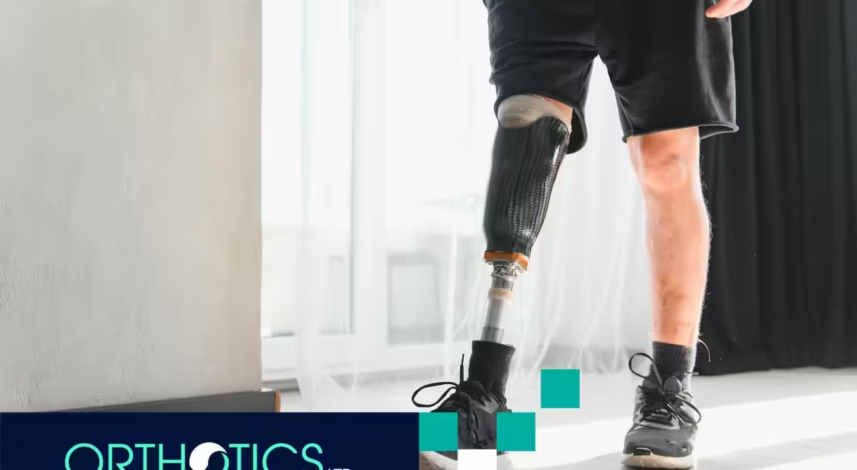
A lower limb prosthetic replaces a missing part of the leg, whether below the knee (transtibial), above the knee (transfemoral), or at more complex levels.
Each prosthesis has several key components:
- Socket: where your residual limb fits
- Suspension system: keeps the prosthetic securely attached
- Pylon/frame: provides structure
- Foot/ankle system: enables movement and balance
Among these, the socket fit is the most important. Even the most advanced prosthetic won’t function well if the socket is uncomfortable or unstable.
Step-by-Step: How a Lower Limb Prosthetic Is Fitted
1. Initial Evaluation and Consultation
The process begins with a comprehensive assessment.
During this stage, a prosthetist evaluates:
- Residual limb shape, size, and skin condition
- Range of motion and muscle strength
- Medical history and healing progress
- Lifestyle goals (walking, sports, daily activities)
Real-world insight: In our sessions, we’ve seen that patients who clearly communicate their daily routines, whether it’s returning to work, caring for family, or staying active, often achieve better prosthetic outcomes because the design is tailored early on.
2. Residual Limb Preparation
Before fitting, the residual limb must be ready.
This may include:
- Reducing swelling with compression garments
- Strengthening muscles through physical therapy
- Ensuring proper wound healing
Case example: One patient we worked with experienced discomfort during early fittings due to swelling. After two weeks of consistent use of a shrinker sock, the limb stabilized, leading to a significantly improved fit and comfort.
3. Casting or Digital Scanning
Next comes creating a precise model of your limb.
There are two common methods:
- Plaster casting: traditional and highly detailed
- 3D digital scanning: faster and increasingly popular
The goal is to capture:
- Exact limb contours
- Pressure-sensitive areas
- Weight-bearing zones
Why this matters: Even small inaccuracies can lead to pressure points or instability later.
4. Test Socket Fabrication
A test (or diagnostic) socket is created using the cast or scan.
This temporary socket allows:
- Initial fitting and adjustments
- Evaluation of comfort and pressure distribution
- Real-time feedback from the patient
Real-world insight: We’ve seen patients feel immediate relief when switching from an ill-fitting socket to a properly adjusted test socket. Small changes—just a few millimeters—can dramatically improve comfort.
5. Initial Fitting and Adjustments
During the fitting appointment:
- The patient tries on the test socket
- The prosthetist checks alignment and fit
- Adjustments are made on the spot
You may be asked to:
- Stand
- Walk short distances
- Shift weight
What clinicians look for:
- Even pressure distribution
- No pinching or excessive movement
- Proper limb positioning
6. Alignment and Component Selection
Once the socket fit is close to ideal, the prosthetic is assembled with other components.
This includes:
- Choosing the right foot type (e.g., energy-storing, basic, dynamic)
- Adjusting alignment for balance and gait
Common Foot Types
| Foot Type | Best For | Key Benefit |
|---|---|---|
| Solid Ankle Cushion Heel (SACH) | Basic mobility | Stability and simplicity |
| Dynamic Response | Active users | Energy return for walking |
| Microprocessor Foot | Advanced users | Adaptive movement |
Case example: A patient aiming to return to light jogging benefited from a dynamic response foot, which improved stride efficiency and reduced fatigue.
7. Definitive Prosthesis Fabrication
After successful testing, the final prosthesis is made.
This version:
- Uses durable materials (carbon fiber, laminated composites)
- Reflects all adjustments made during testing
- Is designed for daily use
8. Gait Training and Rehabilitation
Fitting doesn’t end with receiving the prosthesis.
Patients undergo training to:
- Walk safely and efficiently
- Improve balance and coordination
- Build confidence
Real-world insight: In our experience, patients who commit to physical therapy early adapt faster and report higher satisfaction with their prosthetic.
9. Follow-Ups and Ongoing Adjustments
Your body changes over time, especially in the first year.
Follow-ups are essential to:
- Adjust the socket fit
- Address discomfort
- Optimize performance
Important: It’s normal to need multiple adjustments. A well-fitted prosthetic evolves with you.
Common Challenges During Fitting
Even with expert care, challenges can arise:
- Skin irritation or pressure sores
- Socket looseness due to limb shrinkage
- Balance issues during early use
What we’ve seen in practice: Most issues are temporary and can be resolved quickly when addressed early. Patients who report discomfort right away typically avoid long-term complications.
How Long Does the Fitting Process Take?
The timeline varies depending on healing and individual needs.
Typical Timeline
| Stage | Timeframe |
|---|---|
| Initial evaluation | 1–2 appointments |
| Limb preparation | 2–6 weeks |
| Test socket fitting | 1–3 weeks |
| Final prosthesis delivery | 2–4 weeks |
Total: დაახლოებით 4–12 weeks (varies per patient)
Tips for a Successful Prosthetic Fit
- Be honest about discomfort – even minor issues matter
- Attend all follow-up appointments
- Maintain limb hygiene to prevent skin issues
- Stay active within your limits
- Communicate your goals clearly
Why Proper Fitting Matters
A well-fitted prosthetic can:
- Improve mobility and independence
- Reduce pain and fatigue
- Prevent long-term complications
A poor fit, on the other hand, can lead to:
- Skin breakdown
- Reduced mobility
- Frustration and decreased usage
Final Thoughts
Understanding how a lower limb prosthetic is fitted helps set realistic expectations and empowers you to take an active role in the process. From evaluation to long-term adjustments, each step is essential to achieving a prosthetic that feels natural and supports your lifestyle. In clinical practice, we’ve consistently seen that patients who stay engaged, communicate openly, and follow through with rehabilitation achieve the best outcomes.
If you’re beginning your prosthetic journey or looking to improve your current fit, working with a skilled and compassionate prosthetics team can make all the difference. At Orthotics Ltd., the focus is on personalized care, precision fitting, and ongoing support to help you move forward with confidence. Contact us today!
Frequently Asked Questions
1. How many fittings are needed for a lower limb prosthetic?
Most patients require multiple fittings, especially during the early stages. Adjustments are a normal part of achieving the best fit.
2. Is the fitting process painful?
It shouldn’t be painful. You may feel pressure, but sharp pain or discomfort should always be reported and corrected.
3. How often does a prosthetic need to be adjusted?
Adjustments are common in the first year due to limb changes. After that, periodic check-ups help maintain fit and comfort.
4. Can I walk immediately after getting my prosthetic?
You may begin standing and taking steps early, but full mobility comes with practice and physical therapy.
5. What happens if my prosthetic feels loose?
A loose fit is common as the limb shrinks. Your prosthetist can adjust the socket or recommend additional solutions like liners or socks.
Sources:
- https://atrp.ar.gov/wp-content/uploads/sites/24/2019/05/SNELL-PRESENTATION-FINAL.pdf
- https://pmc.ncbi.nlm.nih.gov/articles/PMC10935386/
- https://pubmed.ncbi.nlm.nih.gov/25860285/
- https://ouhsc.edu/bserdac/dthompso/web/gait/pobmk/prosfeet.htm
- https://pmc.ncbi.nlm.nih.gov/articles/PMC8796559/
